C4D SkyBlox
C4D SkyBlox
Video Tutorial
Product Overview & Purpose
SkyBlox is a straightforward, semi-modular plugin for Cinema 4D to quickly assemble realistic buildings for architectural visualizations, scene extensions, or background renderings in just a few clicks.
SkyBlox’s great strength lies in its Triplex 3-Layer System, which allows for variations in the building’s appearance. By selecting from three variations each for the ground floor, intermediate levels, and the top section, the building’s look can be varied, as can its height, thanks to the ability to stack levels theoretically without limit. And of course its expandability with various new types of buildings via Expansion Packs available at the Expansion Packs Marketplace.** (see also Expansion Packs Manual)
The plugin consists of the SkyBlox Engine and the Mat-Tiler Command Plugin.
1. Installation
- Download the ZIP file.
- Unpack the ZIP file.
- Copy the folder which corresponds to your Cinema 4D version into:
- Windows:
C:\Users\[YourUserName]\AppData\Roaming\Maxon\[YourCinema4DVersion]\pluginsor into a custom plugin folder where you have write permissions. - macOS:
~/Library/Preferences/Maxon/Maxon Cinema 4D [VERSION]/plugins/
You can also easily locate the plugins folder via the Cinema 4D Preferences (Ctrl-E) at the very bottom.
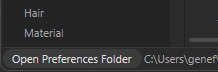
- Windows:
The base plugin already includes the starter pack modules and the distances files
After installation and the initial launch, Skyblox creates a “skyblox” folder in the Cinema 4D preferences directory. All necessary assets and downloads - as well as the lic-new.txt file containing your serial number - are stored there.
Expansions
The installation of an expansion pack is described here.
2. First Start and Registration (Node Lock)
After installation and the initial launch SkyBlox prompts you to enter a serial key obtained from the payment provider Digistore24 and also creates a “skyblox” folder in the Cinema 4D preferences directory.
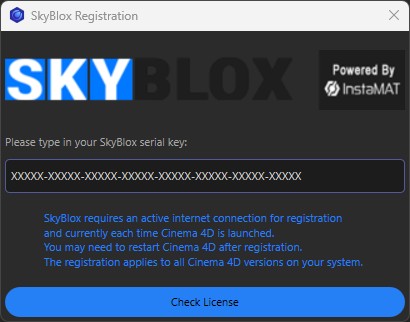
If your license key is valid a Dialog opens
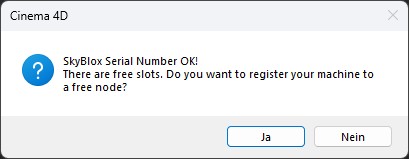
You can register two computers to your license. After the initial activation, you have a one-time opportunity to release and reassign the licenses; thereafter, this is only possible every 30 days. You may contact support at info@3deoskill.com only in emergencies, such as when changing hardware. Should an unusually high number of requests be received, 3Deoskill reserves the right to decline manual node releases. Expansion packs are not subject to this rule.
Once you have registered your first computer, you will receive a confirmation.
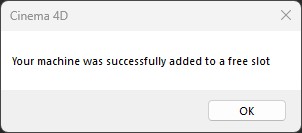
You can now also register a second computer or workstation.
If you want to register a third computer, you will receive this message.
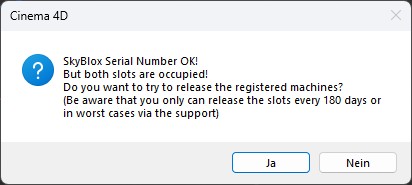
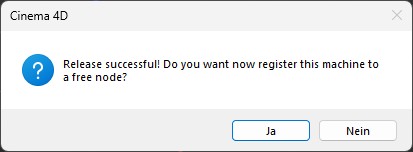
After the initial allocation, as previously mentioned, you have a one-time opportunity to release the nodes. Thereafter, this is only possible every 30 days.
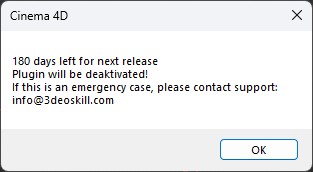
You will receive this message if your release limit has been exceeded.
3. Asset Manager
The SkyBlox Asset Manager automatically keeps your library up to date, enables 3Deoskill to continuously expand, optimize, and maintain your content, and prevents duplicates.
Asset updates only apply to texture maps and distances files. Textures and distances files are essential for SkyBlox to function correctly. Distances for the base plugin are already included when purchasing the base plugin.
SkyBlox is delivered without textures after purchase. You must perform a manual asset update after installation to obtain all the required assets. Simply press ‘Manual Download’. It downloads and installs the latest version of all distances and textures, including those for all expansion packs.
Expansion Packs are not assets in the sense of textures or distances. After purchasing an expansion pack, it must be installed either using Install Expansion or manually.
An asset update is recommended, when you’re missing some textures or distances files e.g. after purchase of an Expansion Pack or after manual deletion of assets.
Please also note that installing different plugin versions across different versions of Cinema 4D can lead to conflicts with assets, since the latest update always includes the latest version of the modules, and older versions would overwrite the modules again. The same version of SkyBlox should always be installed system-wide for each version of Cinema 4D. If an architectural change in Cinema 4D requires the assets to be separated by version, you will be notified in good time via an update of SkyBlox.
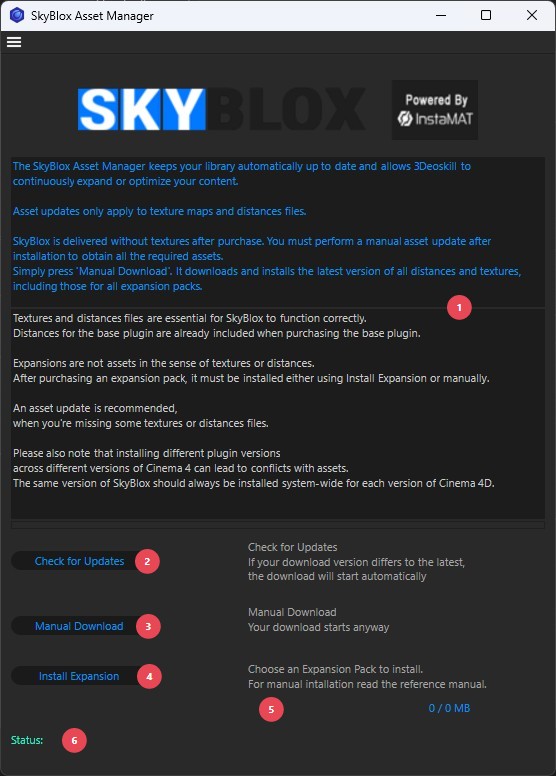
- Just a brief guide on using the Asset Manager.
Check Updates: You can press this button if you want to check whether you have the latest version of the assets. If the verions differs the download starts automatically. Please note, however, that the check will fail if individual textures or distance files have been manually deleted. In this case, you must perform aManual Download.Manual Download: Starts a manual download of all assets and installs them automatically and refreshes the asset version.Install Expansion: If you have purchased and downloaded an expansion pack, you can simply click this button to open an expansion.zip file. Installation takes place automatically. You can also install expansion packs manually.
4. SkyBlox Plugin Interface
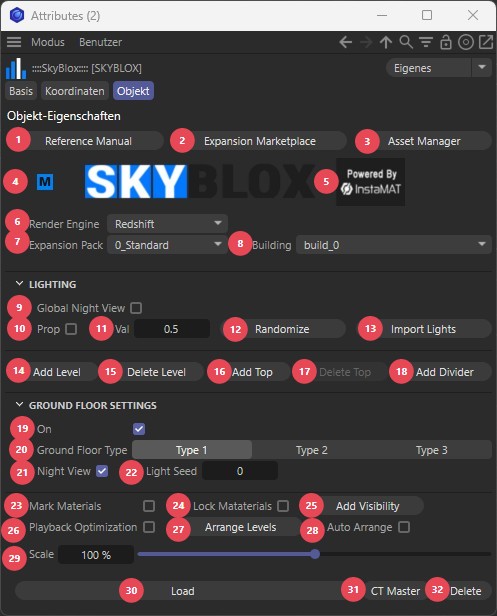
Reference Manual: Button to the Reference Manual.Expension Marketplace: Link to the Expansion Marketplace. This marketplace is constantly evolving and will grow over time.Asset Manager: The asset manager where you can download the necessary textures and distance files for Skyblox. See also: Asset ManagerMaster-Slave: This icon is a visual indicator for the Master-Slave system. Each instance of the plugin in the Object Manager needs to load new materials. If you were to place the building type in the scene multiple times while simply changing its variations and external appearance, the scene would quickly become cluttered with materials. That is why SkyBlox employs a master-slave system. You simply copy the instance in the Object Manager, and that instance becomes aSlaveinstance, utilizing the same materials and modules already in memory. The same applies if you copy a master or slave into another scene. The master is immediately converted into a slave. However, you can convert it back into a master, see also 31 A slave instance can still modify the number of levels and the types of elements used. If the building type is changed in the master instance, all slave instances update their building type synchronously. If you press theDeletebutton (24) in the master, it will also delete all slaves in the scene.- M = Master
- S = Slave
SkyBlox Banner: Opens the credits dialog.Render Engine Menu: Here you can adjust the render engine. Cinema 4D versions since 2024 use Redshift by default, loading the Redshift materials.Expansion Pack Menu: This menu shows you all the packages you have installed. By default, there is only the starter package0_Standard. Expansion Packs basically have to be installed in the preference folder of Cinema 4D underskyblox/models. Only the 0_Standard package is shipped with the base plugin and will also be copied into this destination.Building: From this menu, you can choose a building included in the selected Expansion Pack (7).Global Night View: This checkbox activates the Global Night View. It turns on the lights in the building depending on the parameters in the Ground Floor (15, 16) and the Levels.Prob: This checkbox turns on the probability feature and value (11)- When
Probis enabled, this value determines the probability of a light being turned on or off. The closer the value is to 1, the more frequently the lights are turned on. At a value of 1, all lights are on. The closer the value is to 0, the less frequently the random algorithm turns the lights on. Random control is managed via theseedvalue in the respective level or ground floor settings. Since a simple random choice between on and off often results in too many lights being illuminated, this probability feature can significantly reduce the number of active lights, which often yields a better visual result. Randomize Button: When clicked, the lights on the ground floor and all other levels are switched on or off based on a random value. This eliminates the need to go to each level and manually set the values. Each click generates a new distribution.Import Lights: This command imports the current lights setup into the scene. You can use this, for example, when you want to stay in procedural mode and you want to permanently change the light colors in specific instances. After importing the lights, you can theoretically disable the Night View in the plugin.Add Level: A new Level object is added as a child to the SkyBlox instance in the Object Manager. This Level object is a standard Null Object with a special icon and contains specific User Data that allows the appearance of the Levels to be modified (see Level Interface).
You are not limited to these buttons. You can also manually arrange, duplicate, and insert Levels and Dividers within the Object Manager. This allows you to trick the plugin into adding multiple “tops” or inserting them between levels. However, it should be noted that stacking tops between Levels was not originally intended, as tops can vary in height due to antennas, chimneys, modular attachments, etc. The plugin attempts to strike a reasonable balance here.Delete Level: Deletes a Level.Add Top: Adds a Top (see Level Interface).Delete Top: Deletes a Top.Add Divider: Adds a Divider to the scene. Follow the instructions in the Divider Section.On: This checkbox turns the visibility of the ground floor on or off. This only works when the plugin is in procedural mode.Ground Floor Type: Here you can choose the type of the ground floor.Night View: This checkbox activates the night view for the ground floor.Light Seed: The seed value for randomly turn lights on in the ground floor.
0 = All lights are on.Mark Materials: Since there are now objects of SkyBlox in the scene, the materials are not assigned to any objects directly via standard tags. If you were to use the “Delete Unused Materials” command in the Material Manager, these materials would be deleted. You would then have to click “Load” in the plugin again to re-import them. “Mark Materials” attaches materials to the plugin instance in the Object Manager so that the system recognizes them as assigned, and assigns them a unique ID so they are not detected by the “Delete Duplicate Materials” function. However, this depends on the Cinema 4D version—some versions have or had a bug in this regard.Lock Materials: When this function is enabled, the loading of new buildings is disabled, thereby preventing the loading of new materials. The purpose is to give the user the ability to modify materials—such as changing the color or loading a new texture—to customize them according to their preferences, which can also add visual variety to the buildings.Add Visibility: This command adds a Python visibility tag to the SkyBlox instance. This tag allows you to control the visibility of individual levels as well as the ground floor. This is particularly useful for animations where elements need to be made visible sequentially. See Visibility Tag.Playback Optimization: Whenever a parameter within the building is modified, the building must be recalculated. During animation, this can lead to significant drops in frame rate, particularly when using the scale parameter. With playback optimization enabled, a simple bounding box of the building is returned while the timeline is running.Arrange Levels: Whenever a level is added, it is inserted as a child of the plugin, and its position within the stack is calculated automatically. These levels serve primarily as a visual representation and a means to adjust level settings; they do not directly influence the precise height calculations, and their actual position in 3D space is essentially irrelevant—that logic is handled entirely within the code. However, it is important—especially when objects have been parented to the levels or the levels have been manually reordered in the hierarchy—to ensure they align correctly with the height calculations again; this command ensures they resume their proper position in the stack.Auto Arrange: If this opiton is enabled the levels are arranged automatically.Scale: This slider allows you to adjust the size of the building. It is also worth noting that the building’s dimensions are automatically recalculated to the correct size if you switch to a different scale unit within the document. For example, if you switch from centimeters to inches, the building is scaled accordingly to maintain its original size.
Load: This button loads a new building according to the settings in 5 and 6.CT Master or Make Master: This command converts a slave into a master if no other master exists in the group.Delete: This button removes the plugin instance, the layer, and the materials for this building from the scene. It also cleans up the document’s internal memory. Simply deleting the object via the Object Manager does not always result in a complete memory cleanup. If this command is applied to a slave instance, only the slave is deleted. However, if applied to a master instance, all the aforementioned elements as well as all slaves in the same group are removed.
5. Level Interface
When you click Add Level or Add Top, a level object is inserted into the document as a child of the SkyBlox instance. A level is a simple Null Object with specific User Data, where you can alter the appearance of the level. In terms of design, I opted for Null Objects because Cinema 4D limits the registration of Python plugins to 50 per type. Using anything else would therefore be a waste.
You are not forced to add more levels with these buttons, you can also simply copy and paste them manually in the Object Manager.
Normally, a Top is placed at the very end. Theoretically, no further level can follow it. However, you can trick the plugin into placing a Top between levels within the Object Manager. In theory, a Top does not necessarily have to support seamless stacking. Additional structures, antennas, or other irregularities affect the height of a top section, so the plugin calculates an appropriate height for them. This allows for interesting—almost futuristic—variations, particularly for buildings viewed from a distance. Just keep in mind that the seamlessness of the connection may be partially lost, because, for example, it is not intended to stack a level onto a top unit or a top unit onto another top unit.
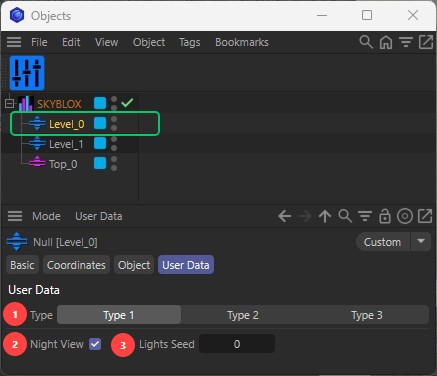
The settings of a level or top can be found in their User Data:
Type: Here you can choose the type of the level or top.Night View: This checkbox activates the night view for the level or top. So if you only want to disable the night view for a specific level, you have to deactivate this checkbox. By default, it is turned on. The Global Night View in the base plugin completely overrides and disables the night view if unchecked.Light Seed: The seed value for random lights in the level or top.
0 = All lights are on.
6. Dividers
Dividers give the user the ability to creatively interrupt the predefined building structure according to their own vision and incorporate their own custom geometry. A Divider is a simple Null Object that uses a height value stored as User Data. A value that determines the distance between the previous and the next level. If you know the height of the 3D element you want to insert, you can specify that height in the divider settings. An empty level with exactly that height is then created, and the 3D element is placed within it.
Notice
Dividers are an additional feature. Please note that using Dividers disrupts the structure of the 3-3-3 building system and, of course, they don’t look good on every building type. But they can provide some visual variety. In addition to the expansion packs, they also make it possible to further extend SkyBlox later on with matching add-on levels for specific building types or various divider packs. This keeps SkyBlox flexible and scalable. I am saving this feature for a future update. Until then, I hope you have lots of fun getting creative with your custom dividers.
When a divider is inserted, its position within the level hierarchy is calculated automatically.
You can then assign one or more 3D objects to the divider as a child in the Object Manager. Since the divider has already been assigned its correct global position, you must reset the relative position of the child 3D object to align it with the divider’s position. The plugin doesn’t care where the null object is located in 3D space. For the plugin, only the order in the Object Manager matters. However, since you want to insert the objects, their position in 3D space is indeed important.
Please note that if Auto Arrange (28) is turned off, you will need to manually readjust the divider’s position in 3D space using Arrange Levels (27) whenever you make hierarchical changes to the levels or dividers in the Object Manager. A divider is always positioned at X=0 and Y=0 relative to the building; please construct your 3D elements accordingly.
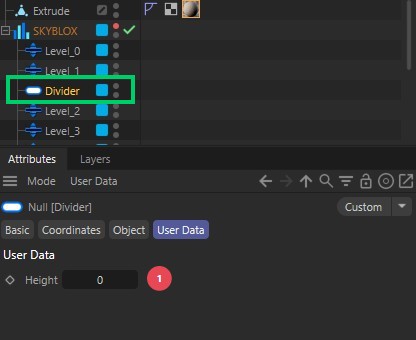
Height: The height value to determine the space to be inserted.
Using the Divider
- If you insert a height value (e.g., 200), an empty space is inserted between the levels.
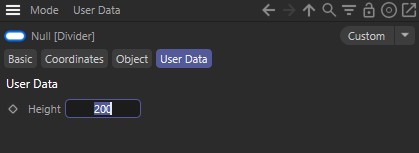
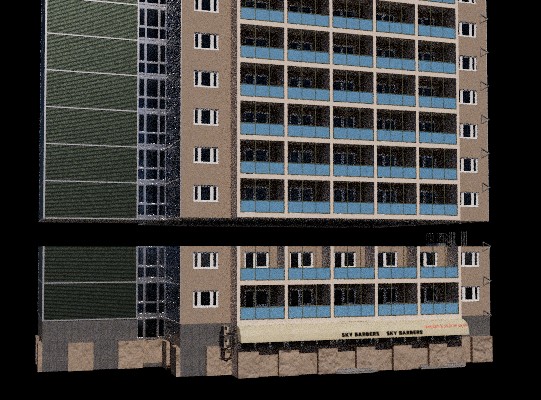
- You now have to drag the 3D element as a child under the divider and reset its position.
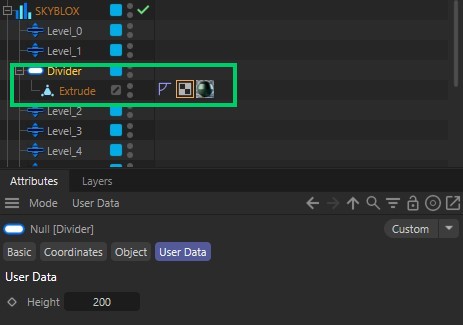
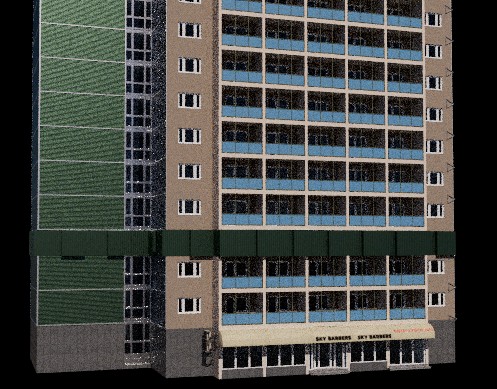
- You can quickly copy the dividers by hand between the levels or add a new divider.
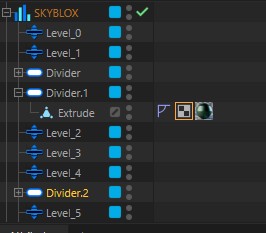
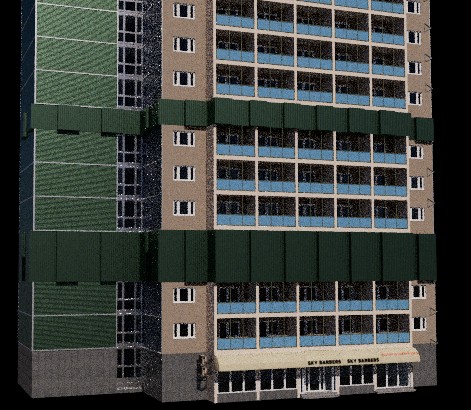
7. Visibility Tag
The Visibility Tag allows you to control the visibility of the levels as well as the ground floor sequentially. However, it can also be repurposed for use with other objects.
It essentially has two functions. The way the “Add Objects” button operates and how visibility is calculated, changes slightly depending on whether it is assigned to a Skyblox plugin or another object.
If it is part of the Skyblox plugin, the “Add” button automatically adds only objects of the “Level” and “Divider” types, ignoring all others. You can still manually drag other objects into the area, however. The visibility setting then toggles the ground floor and the levels on or off in the order defined in the stack.
If the tag is added to any other object, the “Add” button includes all child objects. Instead of the ground floor, it toggles the visibility of the parent object, followed by the objects in the stack in the specified order. The explanation here, however, focuses solely on its interaction with Skyblox. I also explain how to repurpose it in the tutorial video.
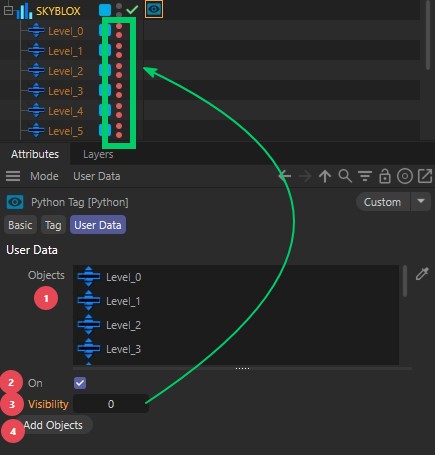
- An In-Exclude Data Field. Here, you can either manually drag in levels or dividers, or click (4)
Add objectswhich does that automatically, if the objects are of the “Level” or “Divider” type. - Turns the visibility function on.
Visibility: This function is currently available only in the plugin’s procedural mode. You can use the slider to display the building floor by floor sequentially and even animate this process. Be aware that the plugin must recalculate the building with every change. You should temporarily disable this function while testing with the timeline running. It starts at 0, meaning no floors are displayed; increasing the value gradually reveals the ground floor and subsequent floors one by one. This enables the creation of animations showing the building’s vertical assembly. It controls theOn(15) parameter of the ground floor for visibility.- You can also change the order or omit objects entirely by removing them from the list.
- You can also control the behavior entirely manually by toggling the visibility of the levels, dividers, and the ground floor—both during rendering and in the editor. To do this, (2) must be disabled, or the tag must be completely removed.
Add Objects: This button adds all child objects of the plugin to the list, provided they are of the type Level or Divider.